
Social Workflows
Starting a Candle Business: Social Media for Your First 90 Days
A three-phase plan for the first 90 days of a candle brand: what to post before launch, how to photograph candles with a phone, and how to turn market days into content without adding hours.
Kushal Shrestha
Marketing & Engineering
10 min read

In short
- Split the first 90 days into three phases: set up and prepare, launch, then repeat what worked and add markets.
- Post a small number of times each week that you can keep up. A steady rhythm beats a burst followed by silence.
- Rotate five content types: product, making, use, customer and market. Each one has a different job.
- Shoot candles in one spot with daylight, a plain surface and a few repeatable angles. A phone is enough.
- Treat market days as content: prepare before, capture during, follow up after.
- Check the rules that apply where you sell before you publish product claims. This article does not cover them.
For starting a candle business, the best social media plan for the first 90 days has three phases. Spend the first stretch getting ready, the middle stretch launching, and the last stretch repeating what worked while adding markets. Post a small amount that you can keep up, photograph candles in one repeatable spot, and treat every market day as material for content. This article is for owners of a new, owner-run candle brand who are also the whole marketing team.
You will get a phase-by-phase plan, a simple photo setup, a market-day routine and a hypothetical example you can copy.
Why plan the first 90 days at all
A new candle business has plenty to do: product, packaging, a shop page, maybe a market stall. Social media tends to get whatever time is left, which is usually none. The result is a feed with a burst of posts at launch and then silence.
A 90-day plan fixes the order of work. Three short phases keep the job small:
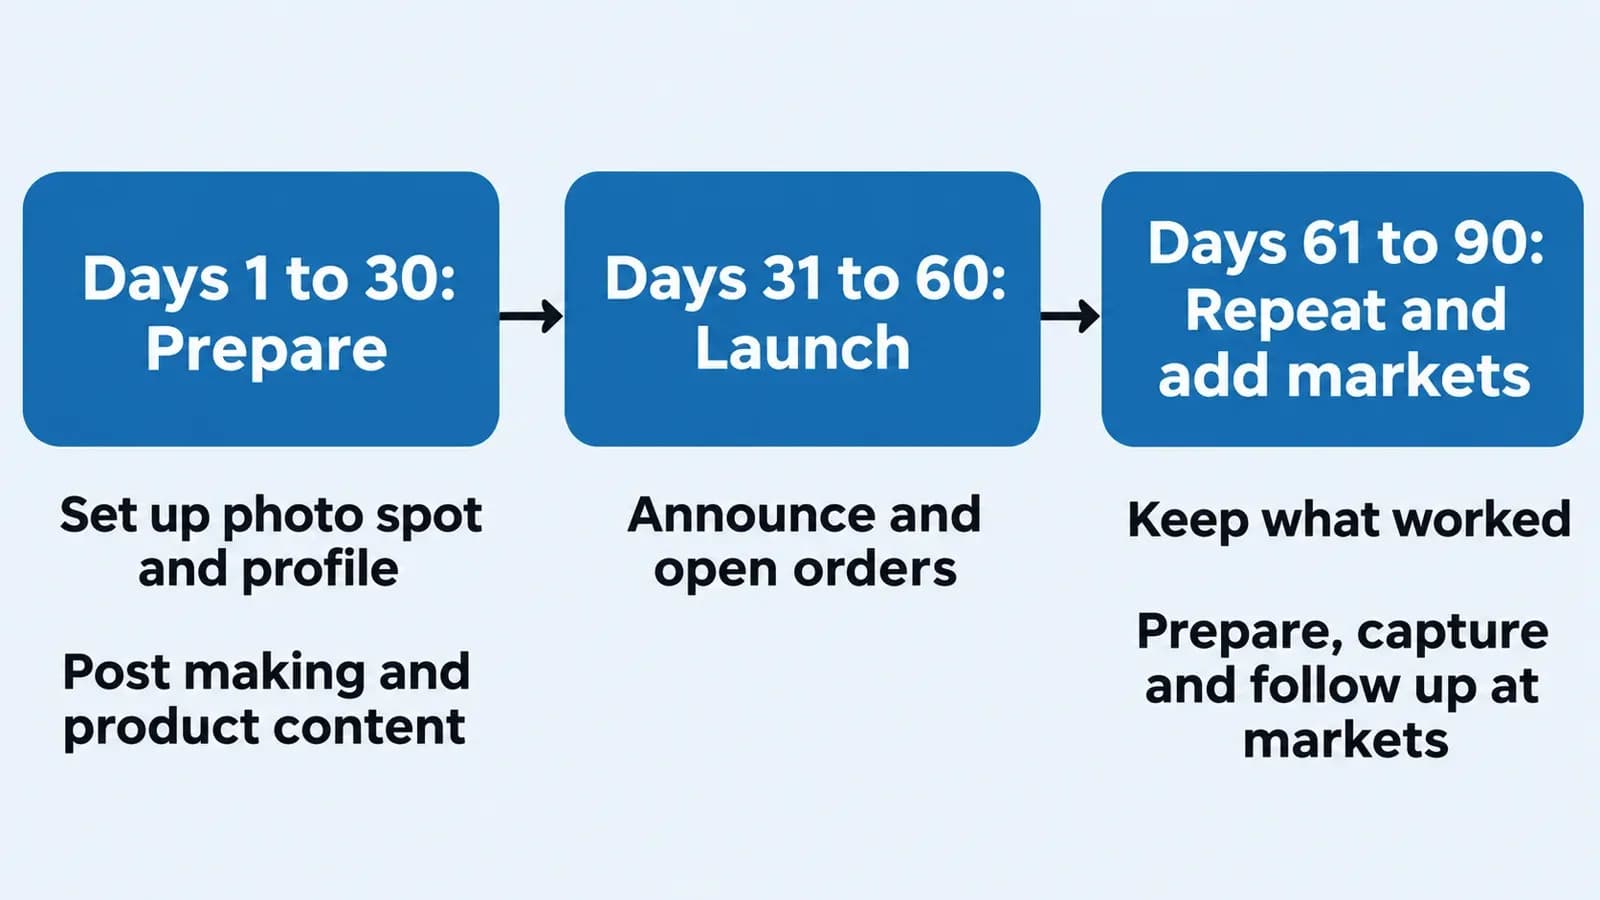
- Days 1 to 30, prepare. Build the habit and the raw material before there is pressure to sell.
- Days 31 to 60, launch. Announce, open orders and show the product in use.
- Days 61 to 90, repeat and add markets. Keep what worked, drop what did not, and use market days as content.
The numbers are a planning frame, not a promise. If the product is not ready on day 30, shift the phases. The order matters more than the dates.
One decision comes before any of this: pick a posting rhythm you can keep for the whole 90 days. How often a one-person beauty brand should post on Instagram walks through choosing one, and the logic carries over to candles.
Days 1 to 30: prepare before you sell
The first month is about setting up so that later posting is quick.
- Write down what the brand is. Note the voice, the kind of buyer you picture and what makes the candles different. A few plain sentences are enough. Fixed answers make every later caption faster.
- Set up the profile. A clear name, a short description of what you make, and a link to where people can buy or join a list.
- Build one photo spot. More on this below. Do it now, while there is no deadline.
- Collect raw material. Photograph pouring, wicks, packaging, the workbench and test batches. This material feeds the launch phase.
- Post the making, not the selling. Early posts can show the process and the story behind the first products. No sales pitch is needed yet.
Checking the rules also belongs in this phase. Before you write product claims or print labels, check the rules that apply where you sell, and keep any claims in posts within them. This article does not cover specifics.
Days 31 to 60: launch
The launch phase is where posts start asking for something. Keep the ask simple and honest.
- Announce the opening. One clear post saying what is available and where to order.
- Show each product on its own. One post per candle, with a clean photo and a caption that answers a plain question: what is it, who is it for, how is it used.
- Show the candle in a room. A lit candle on a shelf or table helps a buyer picture it at home. Keep captions to what you can see, not promises about how a scent will make anyone feel.
- Answer questions in public. When someone asks about burn habits, shipping or gifting, turn the answer into a post.
- Say thank you. Share a customer's photo only after asking permission.
If you struggle to find topics, AI social media post ideas from what you sell shows how to turn a product list into a run of posts, and skincare launch content checklist is a launch checklist from a neighboring category that adapts well to candles.
Five content types to rotate
Mixing a few types keeps the feed from becoming one long advert. Each type has its own job.
| Content type | Job it does | Candle example |
|---|---|---|
| Product | Shows exactly what is for sale | One candle on a plain surface, clear label visible |
| Making | Builds trust in the maker | Pouring day, wicks laid out, a cooled batch |
| Use | Helps a buyer picture it at home | A lit candle on a shelf, a dinner table or a desk |
| Customer | Shows other people choosing it | A shared photo with permission, a thank-you note |
| Market | Brings the stall online | The table setup, a new display, a note on where you will be |
A simple rotation: do not post the same type twice in a row, and make sure a product post appears at least once in every few. If a week feels thin, a making post is the cheapest to produce because the work is already happening.
Photographing candles with a phone
Good candle photos do not need a studio. They need the same conditions every time, so the feed looks like one brand.
- Use daylight. Place the setup beside a window and avoid mixed lighting from lamps.
- Choose one plain surface. A wooden board, a cloth or a sheet of paper. Keep it the same across posts.
- Pick three angles and repeat them. For example: straight on, slightly above, and a close detail of the label or wick.
- Keep props few. A dried stem, a match or a small dish is enough. The candle is the subject.
- Photograph lit and unlit. Lit candles photograph differently, so try both and note what works in your light.
- Wipe the jars. Fingerprints and dust show up on a close photo.
- Batch it. Shoot every product in one session, then post from the folder across the following weeks.
For a longer walk-through of turning product shots into a week of posts, see product photos to Instagram: a week of content.
Days 61 to 90: repeat what worked and add markets
By day 60 there are real posts to learn from. Look back through them and ask two questions: which posts did people respond to, and which led to messages or orders? Pick one measure that matches your goal, such as saves, replies or orders, and compare on that alone. Keep the formats that did well. Drop one that took a lot of effort and brought little back.
This is also the phase to add markets, because by now there is a feed to point people to.
Before the market
- Post the date, the place and a photo of what will be on the table.
- Say what a visitor can expect: the range, any special batch, how you take orders.
- Prepare a sign or card with the account name so visitors can follow.
During the market
- Take two or three photos early: the table, a close shot of the display, a candle someone is looking at (ask first if a person is in frame).
- Note questions visitors ask. Each one is a future caption.
- Do not try to post live while serving. Capture now, post later.
After the market
- Post a thank-you with one good photo.
- Answer the questions you noted.
- Tell followers where the next market will be, or how to order online.
Check the rules that apply to any market you plan to attend. This article does not give specifics.
A hypothetical example
This example is hypothetical, with an invented brand, to show how the pieces fit. It contains no real results and none are claimed.
Imagine a hypothetical one-person candle brand called Birch & Match. The owner has a small website describing three candles and a plan to attend a local market in the third month.
Days 1 to 30. The owner writes a few sentences on voice and buyer, sets up a window-side photo spot and shoots all three candles from the same three angles. Two making posts go out each week, showing pouring day and wick prep.
Days 31 to 60. One announcement post opens orders. Each candle then gets its own product post, followed by a lit-on-a-shelf post. A customer question about gifting becomes a short caption on how orders can be wrapped.
Days 61 to 90. The owner reviews saves and replies from the launch posts and keeps the formats that drew replies. Before the first market, a post shows the planned table. At the market, three photos are taken. Afterward, a thank-you post and a caption answering visitor questions go out.
Notice what stays constant: one photo spot, a short rotation of content types and a rhythm the owner can hold.
Make the plan easier to keep
The weak point of any 90-day plan is week five, when the novelty has gone and orders are piling up. Drafts prepared ahead of time take the pressure off.
Youanai Social builds a Business DNA profile from your website, capturing brand voice and offer rules, and drafts social posts from it. Every draft waits for your approval before anything is posted. There is a free way to start. If you have a website with your candle range, that is enough to begin. A short routine for reviewing drafts is laid out in approve to ship for one-person ecommerce social.
Common mistakes in the first 90 days
- Waiting for a perfect launch. Posting the making process early costs nothing and builds an audience before the sale.
- Posting only adverts. A feed of product shots with a buy link in every caption gives followers little reason to stay.
- Changing the photo style every week. One spot, repeated, looks like a brand.
- Overpromising in captions. Describe what is visible and what the candle is. Check the rules that apply where you sell.
- Skipping the follow-up after a market. The market is only half the content. The thank-you and the answered questions are the other half.
- Setting a rhythm that cannot last. Pick the amount you can still do in a bad week.
FAQ
How do I start a candle business on social media?
Set up a clear profile, build one photo spot, and post the making process before launch. Then announce, open orders and show each candle on its own. Keep a steady rhythm you can hold for the first 90 days.
What should a new candle business post first?
Start with the making process and the story behind the first products. Pouring days, wicks and packaging are easy to capture and ask nothing of the viewer. Product and sales posts come once the candles are ready to order.
How often should a new candle brand post?
Choose a rhythm you can keep through a busy week, then hold it. A smaller schedule kept for 90 days does more than a large one dropped after a fortnight.
How do I take good photos of candles?
Use daylight beside a window, one plain surface and three repeatable angles. Keep props to a minimum and wipe the jars before shooting. A phone is enough.
How can I use craft markets to grow my candle business online?
Post before the market with the date and a photo of the table, take a few photos during it, and follow up afterward with a thank-you and answers to visitor questions. Put the account name on a sign so visitors can follow.
Do I need to check any rules before I sell candles?
Check the rules that apply where you sell before you print labels or write product claims. This article does not give specifics.
Can I plan my posts ahead of time?
Yes. Shooting all products in one session and drafting captions in a batch makes a steady rhythm easier. Drafts can wait for your review before anything goes out.
Keep reading
What to Post on Facebook: A Weekly Mix for Small Brands

A one-person product shop does not need a big content plan for Facebook. Pick a few post types that suit the page,…

9 min read
Instagram Collab Post: How Two Small Shops Co-Post

A collab post puts two shops in front of each other's audiences, but only if the idea, the wording and the sign-off…

10 min read
Later Alternative: Buffer vs Later for Small Product Shops

A plain look at Later and Buffer for an owner-run shop: what each plan lists, what each costs as of 2026-11-03, and…
10 min read